Printing your holographic stickers at home can be a fun and creative way to personalize your belongings or make unique gifts for friends and family. But how do you make sure your homemade stickers look sharp and professional?
With the right tools and tips, you can create high-quality holographic stickers that shine as brightly as the ones you see in stores. Whether you’re designing for your water bottle, laptop, or notebook, here are some simple tips to get started.
What Are Holographic Stickers?
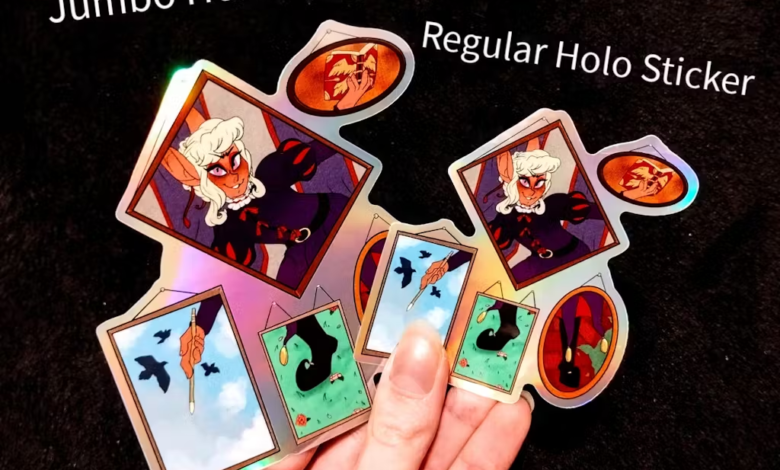
Holographic stickers are special stickers with a shiny, rainbow-like finish. The surface reflects light, creating a cool, colourful effect that makes any design stand out.
While you can buy pre-made holographic stickers, printing your own at home allows you to customize the design, size, and shape exactly how you want it.
Tools You’ll Need
Before you can start printing your holographic stickers at home, make sure you have the following materials:
- Printer: A good inkjet or laser printer works best. Make sure your printer can handle sticker paper.
- Holographic Sticker Paper: This is a special paper with a shiny surface. You can buy it online or at craft stores.
- Design Software: You’ll need a way to create or choose your designs. Programs like Adobe Illustrator, Canva, or Microsoft Word can help you design stickers.
- Clear Laminate Sheets (Optional): To make your printed stickers waterproof and more durable, you can add a layer of clear laminate over them for extra protection.
- Scissors or Cutting Machine: Once your stickers are printed, you’ll need something to cut them out. Scissors work fine, but a cutting machine like a Cricut can make the process faster and more precise.
Tip #1: Start with a Great Design
The key to printing high-quality holographic stickers is starting with a great design. Think about what you want your sticker to show. Do you want a cool quote, a cute drawing, or a logo? The design should look good on a smaller surface, so use only a few tiny details that might get lost when printed.
When making your design, use high-resolution images (300 DPI is ideal). This ensures that your sticker won’t look blurry when it prints. You can create your design using design software or download free website designs.
Tip #2: Use the Right Printer Settings
Once you have your design ready, it’s time to print! But before you hit the print button, check your printer settings. To get the best quality:
- Choose the Best Print Quality: Set your printer to the highest quality option. This will use more ink, but it will make your stickers look much sharper and more vibrant.
- Select the Right Paper Type: In your printer settings, select the option that matches your paper type. If you use holographic sticker paper, choose “Glossy” or “Photo Paper” for the best print quality.
- Check the Size and Layout: Make sure your design fits the size of your paper and that you’re not cutting off any important parts. You can print a test page on regular paper before using the holographic paper to ensure everything looks right.
Tip #3: Let the Ink Dry Completely
After printing, give your stickers some time to dry completely. This is especially important when using inkjet printers. If you try to cut or handle the stickers too soon, the ink might smudge, and all your hard work could be ruined. Let the stickers sit for 10-15 minutes before moving on to the next step.
Tip #4: Add a Protective Layer (Optional)
If you want your stickers to last longer, especially if you plan on sticking them on items that get wet (like water bottles), consider adding a protective layer.
You can do this by applying clear laminate sheets over the stickers after printing and drying. This makes your stickers waterproof, scratch-resistant, and much more durable.
Simply cut a piece of laminate to fit over your sticker, then press it down evenly to avoid air bubbles. You can buy laminate sheets at most office supply stores.
Tip #5: Cut Out Your Stickers
Once your stickers are printed and dried, it’s time to cut them out! If you’re using scissors, carefully cut around the edges of your design. If you have a cutting machine, like a Cricut or Silhouette, you can use it to make precise cuts, especially for more complex shapes.
Leave a small border around your design so your stickers are easier to peel off the paper. If you want rounded corners, try using a corner punch to give your stickers a professional finish.
Tip #6: Test on Different Surfaces
Once you’ve printed and cut your holographic stickers, test them out! Try sticking them on surfaces like water bottles, notebooks, or your laptop. This will give you a good idea of how they look and how well they stick. If everything looks good, you’ve made high-quality holographic stickers at home!
Conclusion: Get High-Quality Holographic Stickers from Vograce
While printing holographic stickers at home is fun, you can always count on Vograce for professional, high-quality ones without the hassle. With customizable designs and top-notch materials, you’ll get stickers that last and look amazing on all your favorite accessories.
To get your holographic stickers, visit Vograce for an amazing discount today!